 +65 8468 8478


Step 1: Visit the Partner Portal
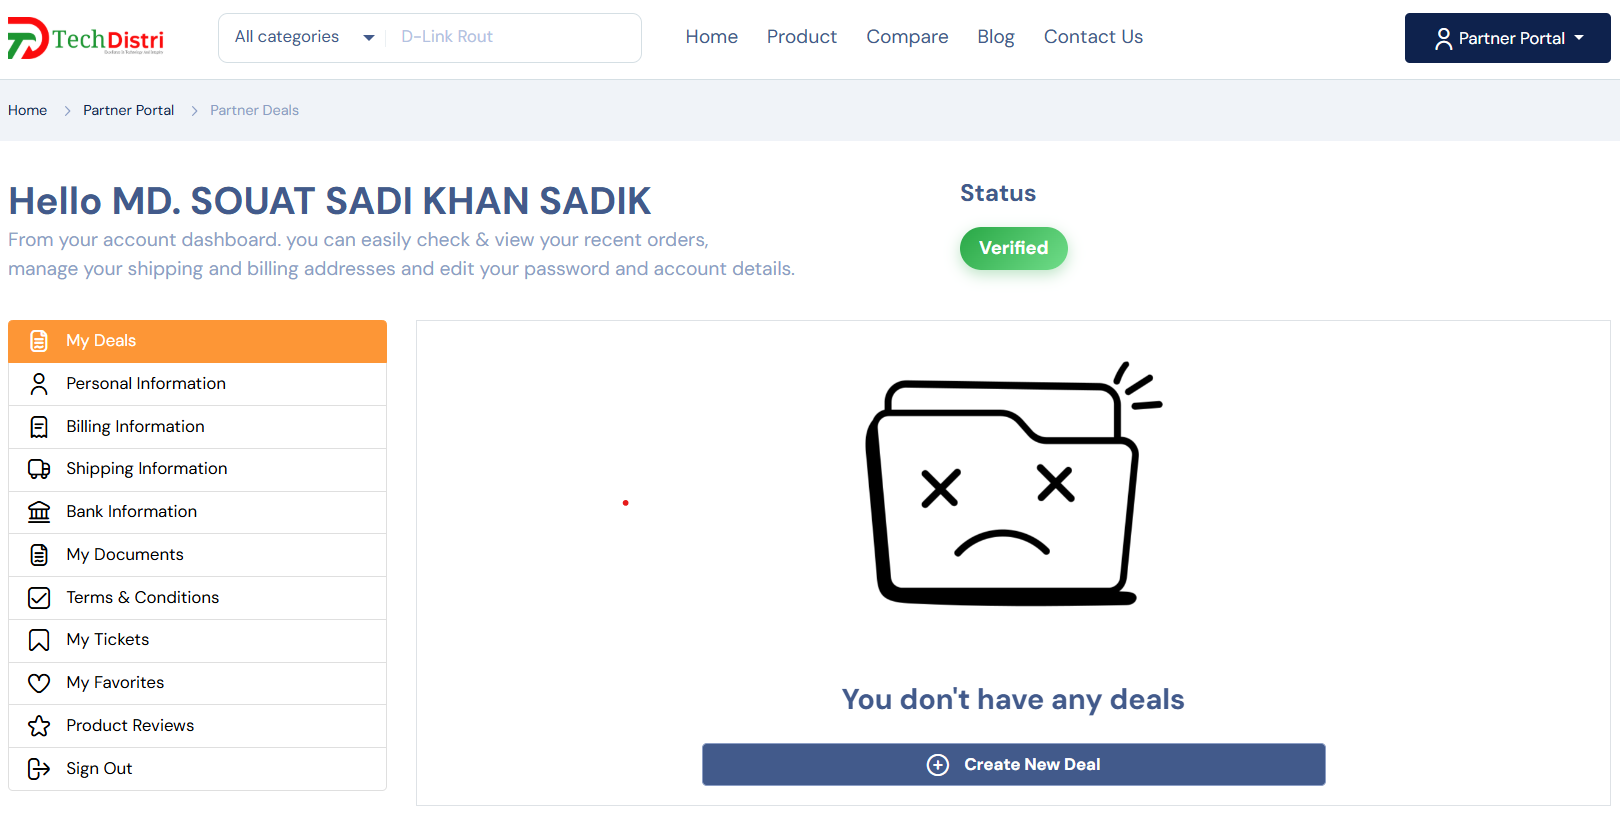
The Partner Portal is the dedicated area where all partners manage their accounts, submit required information, manage deals, and track their approval status.

Once you click the Partner Portal button, you will be redirected to the login page, where you can either sign in or create a new partner account. Don't worry — we will guide you through every step.
Step 2: Log In or Create a New Partner Account
After entering the Partner Portal, you will see the login page. This page is designed for both existing partners and new applicants.
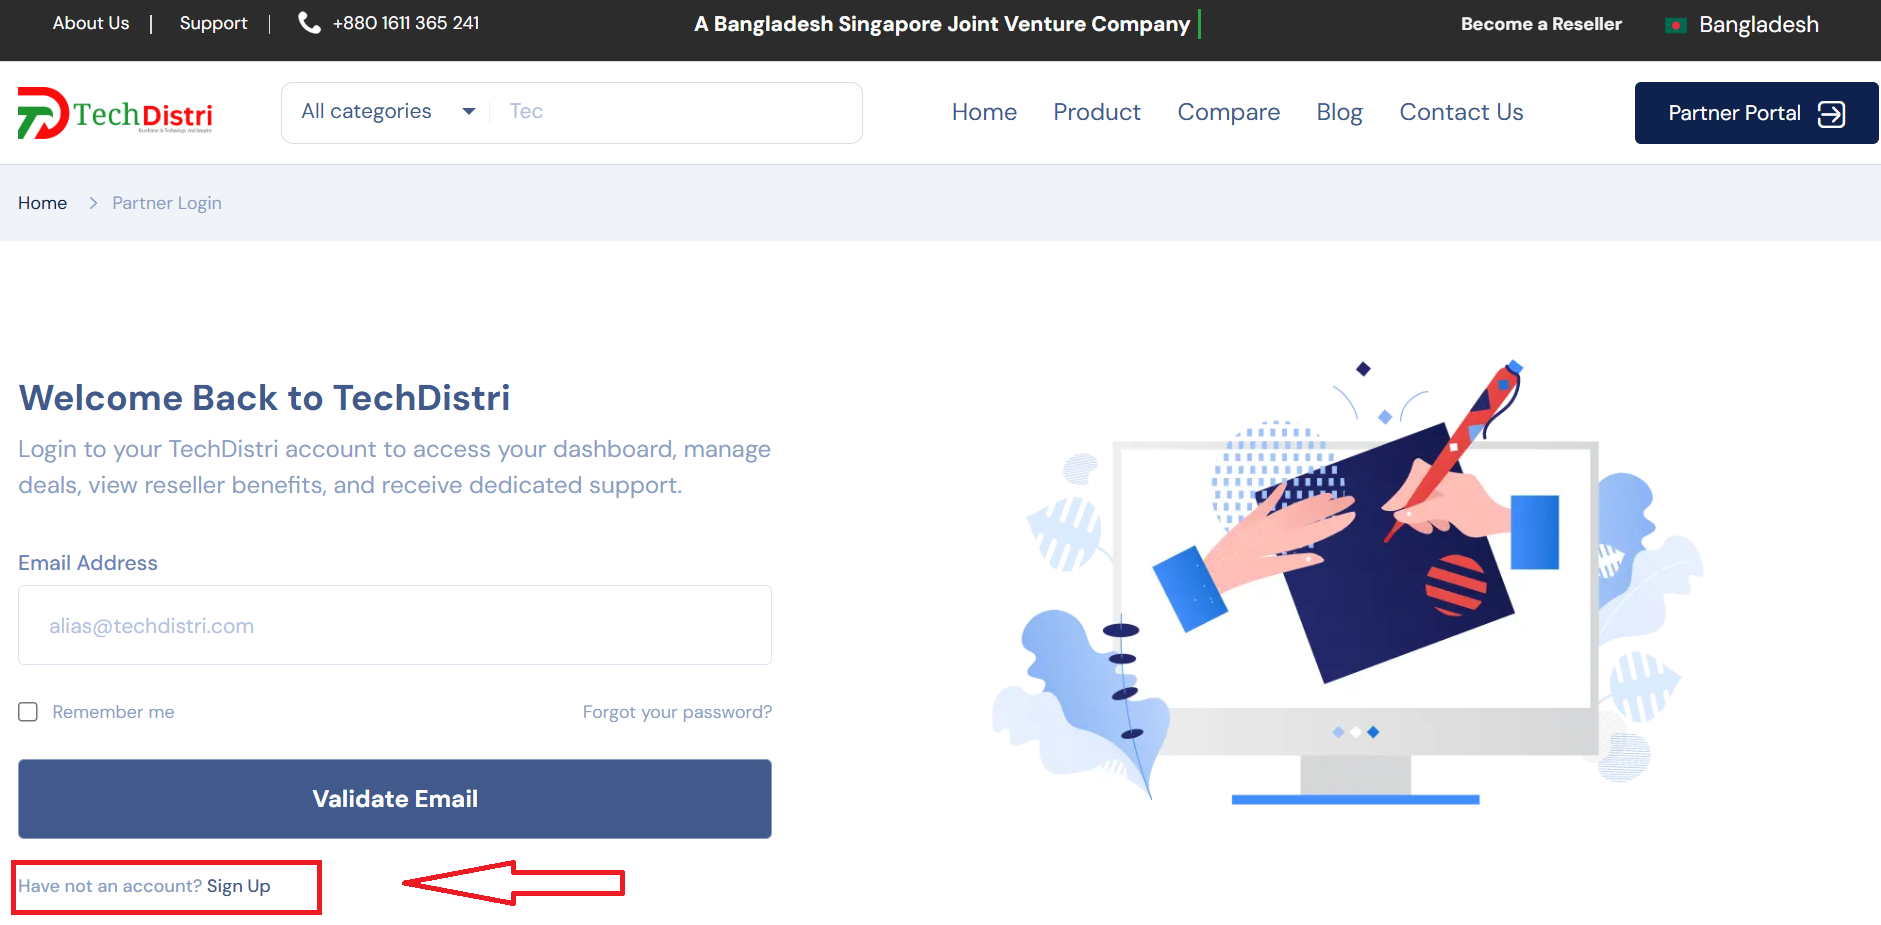
If you are already a registered partner, simply enter your email address, then click the Login button to access your partner dashboard.
If you are new to Techdistri, click on the Sign Up link shown on the login page. This will take you to the partner registration form where you can create a new account.
Step 3: Fill Out the Sign-Up Form
On the Sign-Up page, you will create your new partner account. Make sure to fill out all fields carefully — accuracy helps speed up approval!
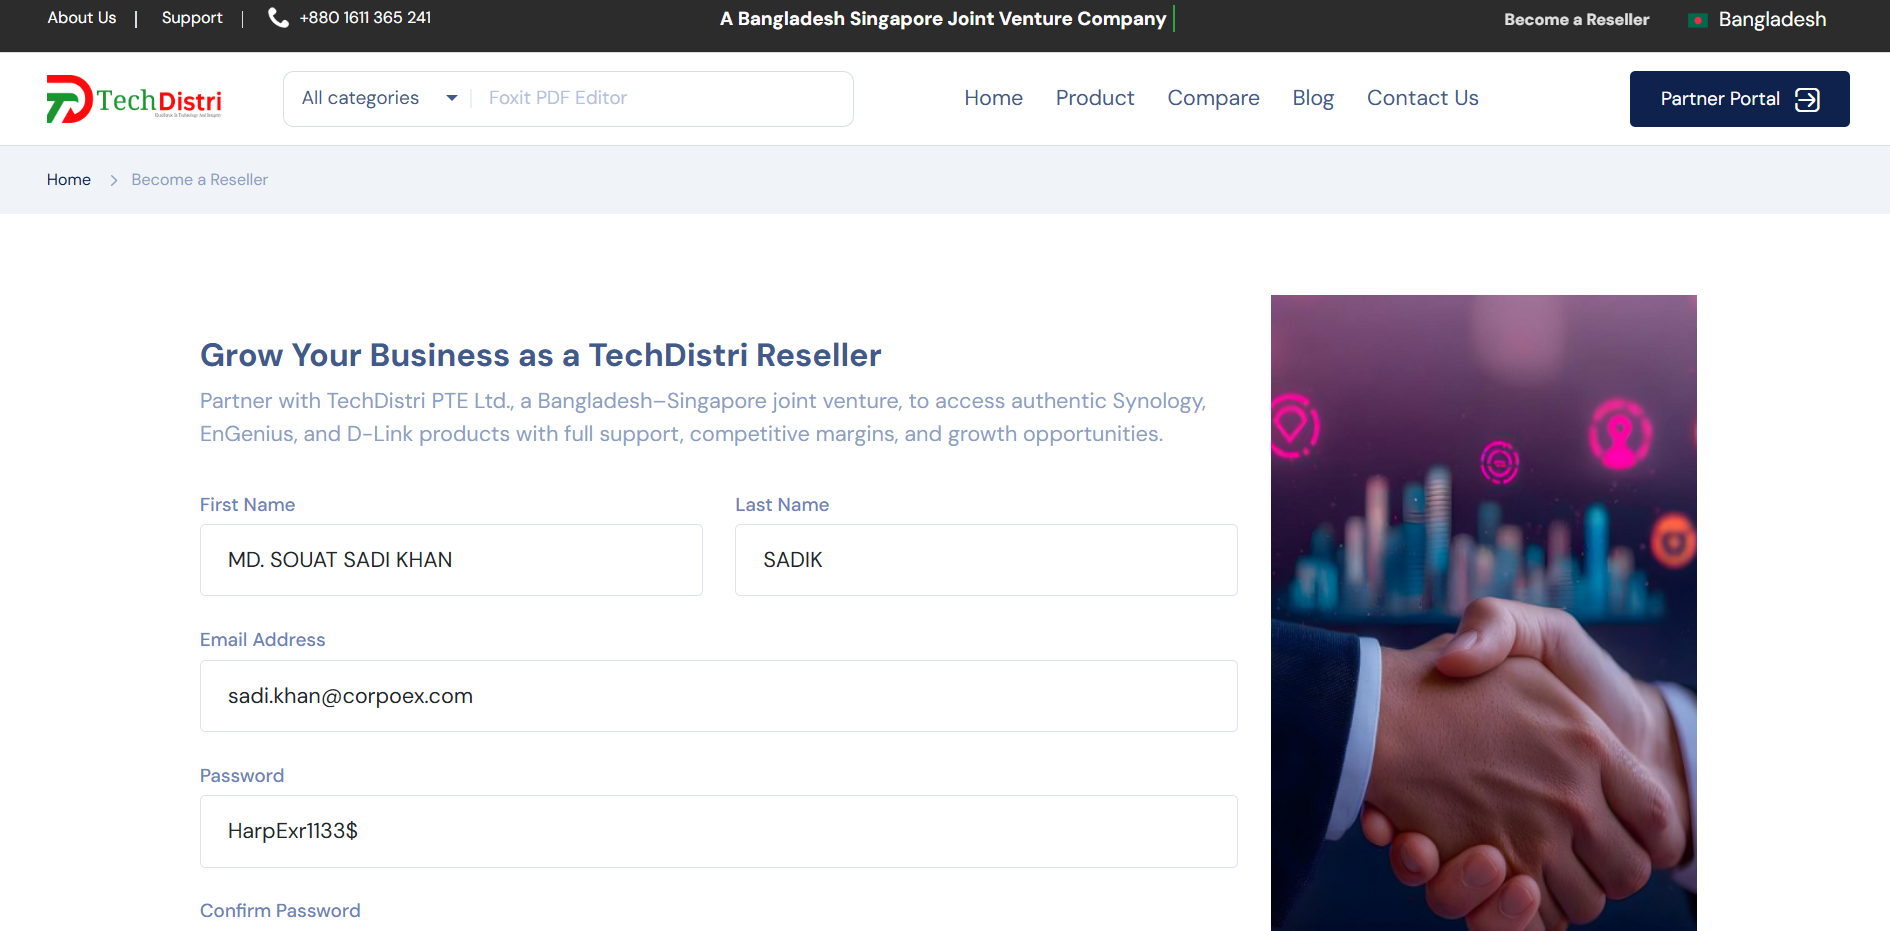
- First Name: Enter your first name (minimum 4 characters, maximum 100).
- Last Name: Enter your last name (minimum 4 characters, maximum 50).
- Email Address: Use your company email. Personal emails like Gmail, Yahoo, or Outlook are not accepted.
-
Password: Must be at least 8 characters and include:
- Uppercase letter
- Lowercase letter
- Number
- Symbol (like !@#$%)
- Confirm Password: Re-enter your password to confirm.
Once all fields are correctly filled, click the Sign Up button. If everything is valid, your account will be created, and you’ll receive a 6-digit OTP code via email for verification.
Step 4: Verify Your Email
After signing up, you will receive a 6-digit OTP code in your company email. This is a quick and secure way to verify your account.
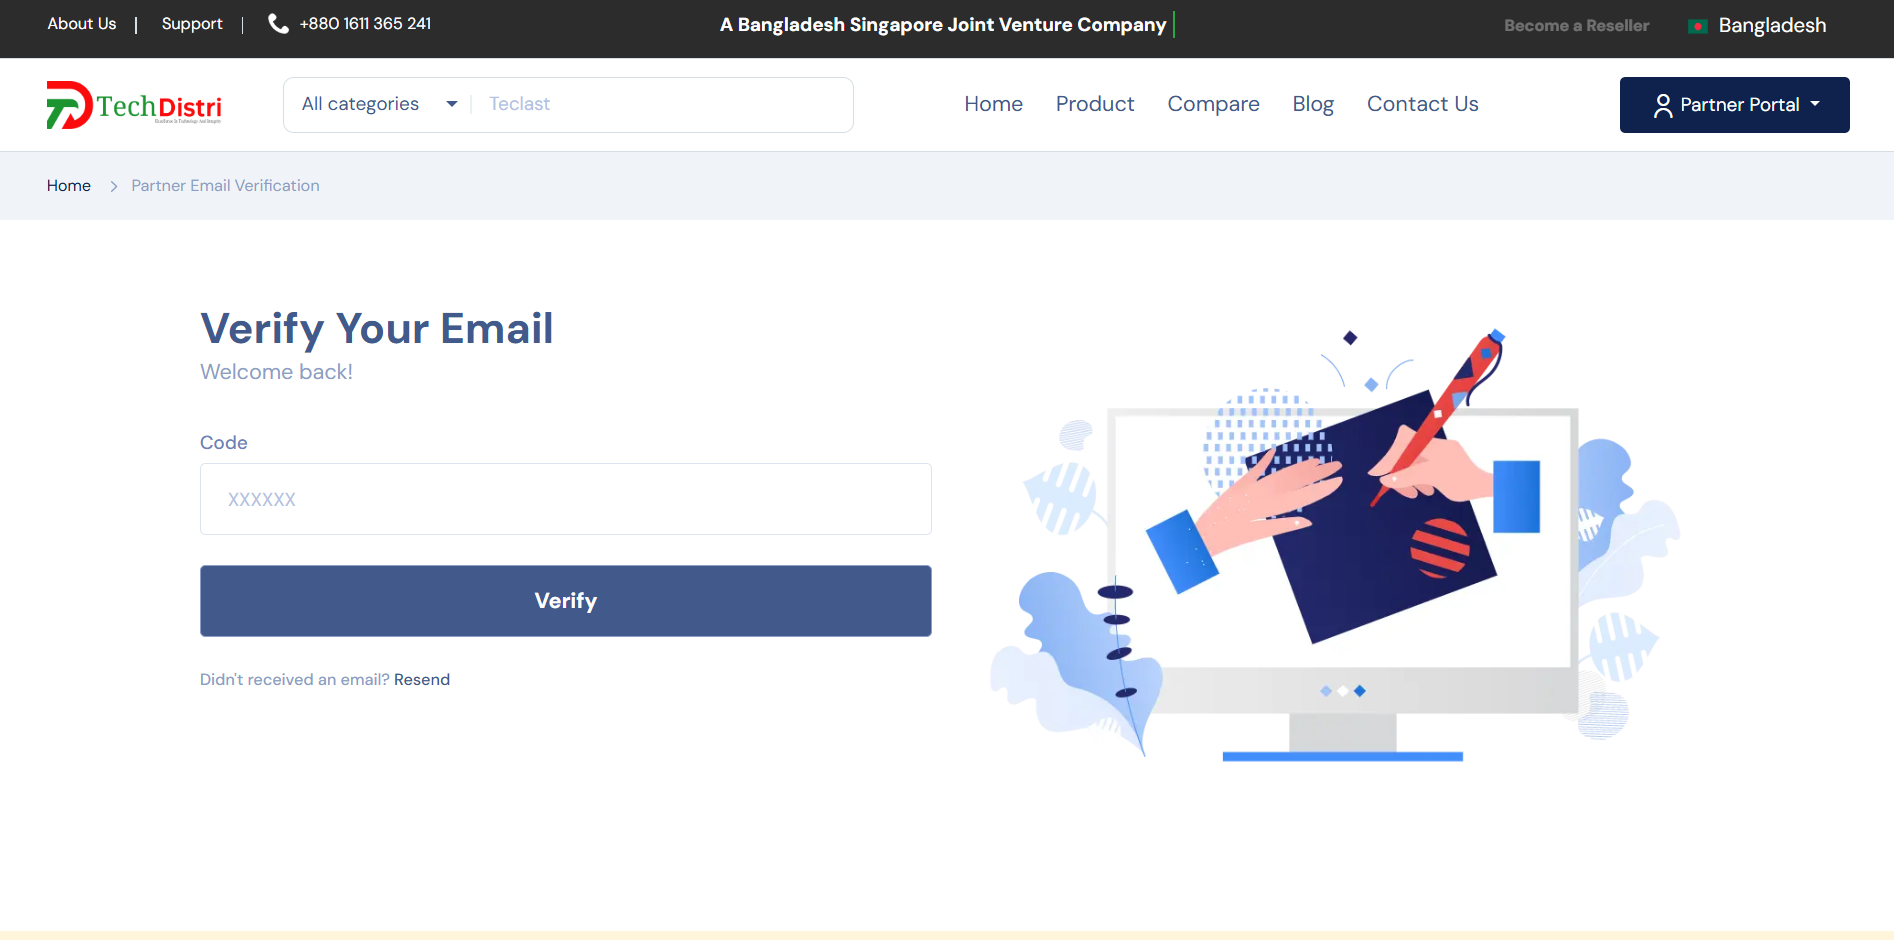

Enter the 6-digit code exactly as it appears in your email. Double-check for typos, as it’s case-sensitive and time-limited.
Once the OTP is verified successfully, you will be automatically redirected to the next step, where you can complete your personal, billing, shipping, and bank information to become a full partner.
Step 5: Complete Your Personal & Business Information
Now that your account status is Pending, it’s time to fill in your personal and location information. This step ensures we know who you are and helps us process your partner application faster.
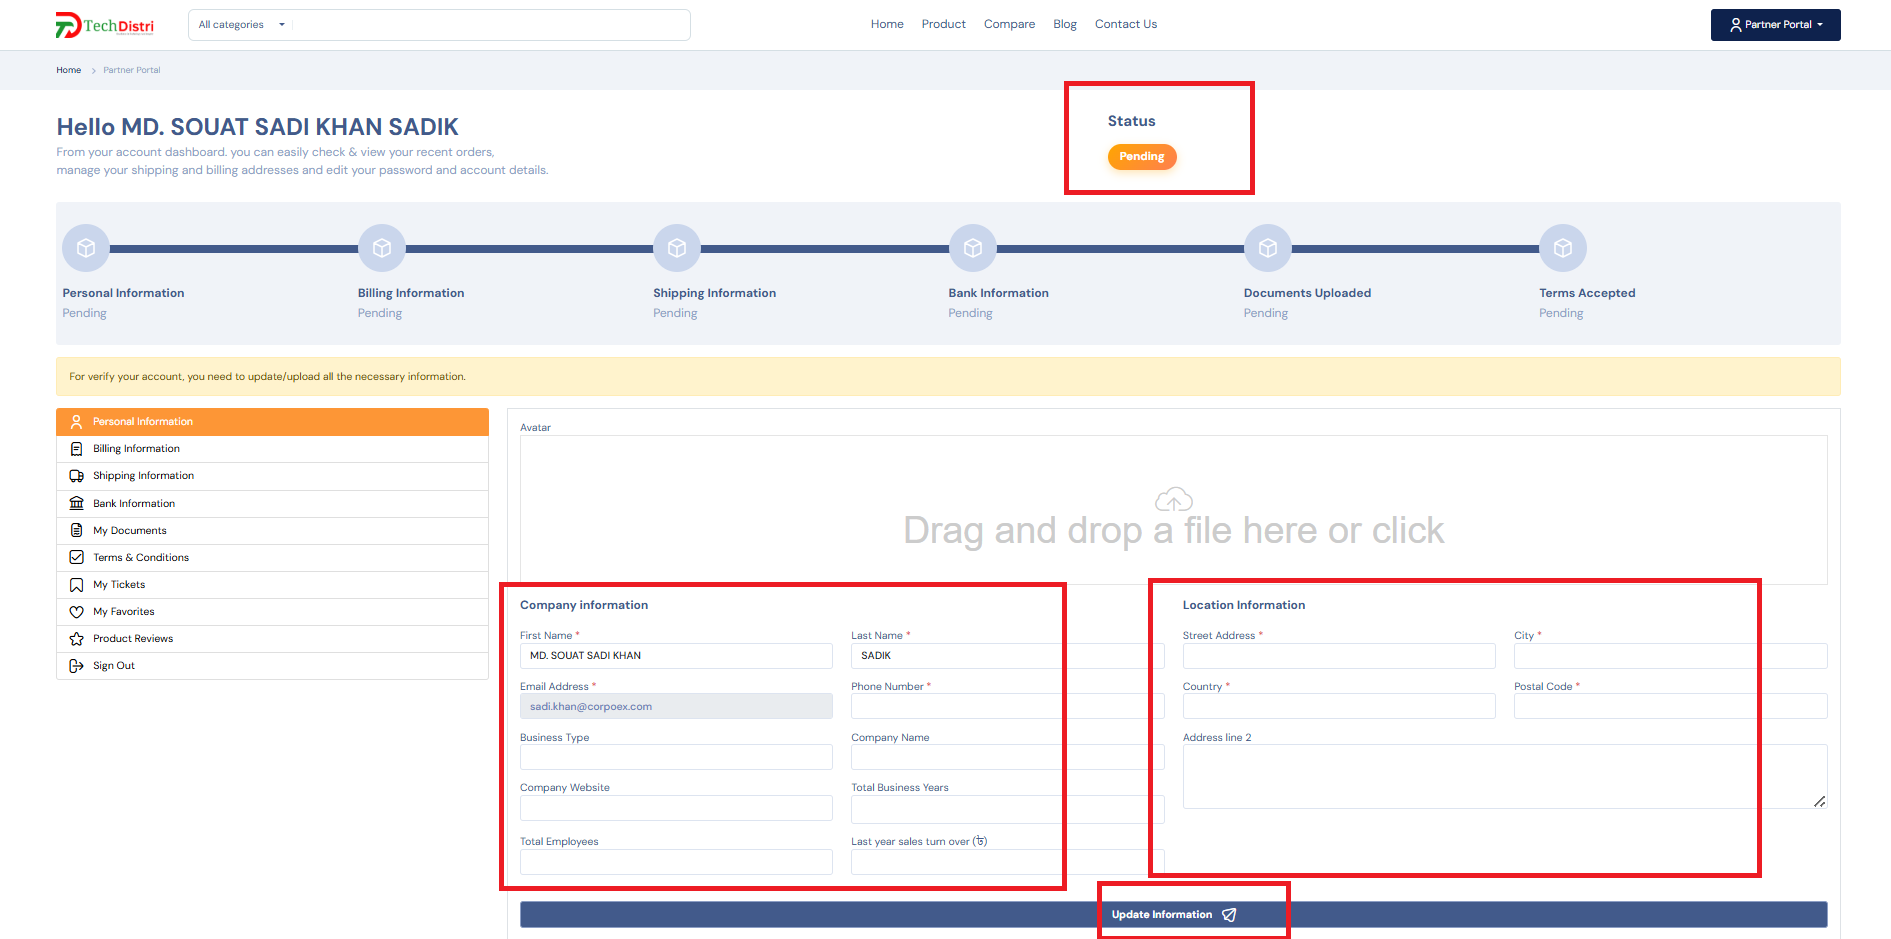
Personal Information
- Avatar: Upload a clear profile picture of yourself.
- First Name: Required
- Last Name: Required
- Phone Number: Required
Business Information
- Business Type: Select your business type (e.g., System Integrator, IT Solutions, Retailer).
- Company Name: Required
- Company Website: Optional, but use HTTPS if provided
- Total Years in Business: Enter the number of years
- Total Employees: Enter total number of employees
- Last Year Sales Turnover (BDT): Enter your last year’s turnover in BDT
Location Information
- Street Address: Required
- City: Required
- Country: Required
- Postal Code: Required
- Address Line 2: Optional
Once you click on the Update Information button, System will validate your given data. If all goods, then system will automatically store your information according to your account.
Step 6: Fill in Your Billing Information
Your billing information helps us process invoices and payments efficiently. Please provide accurate details to avoid any delays.
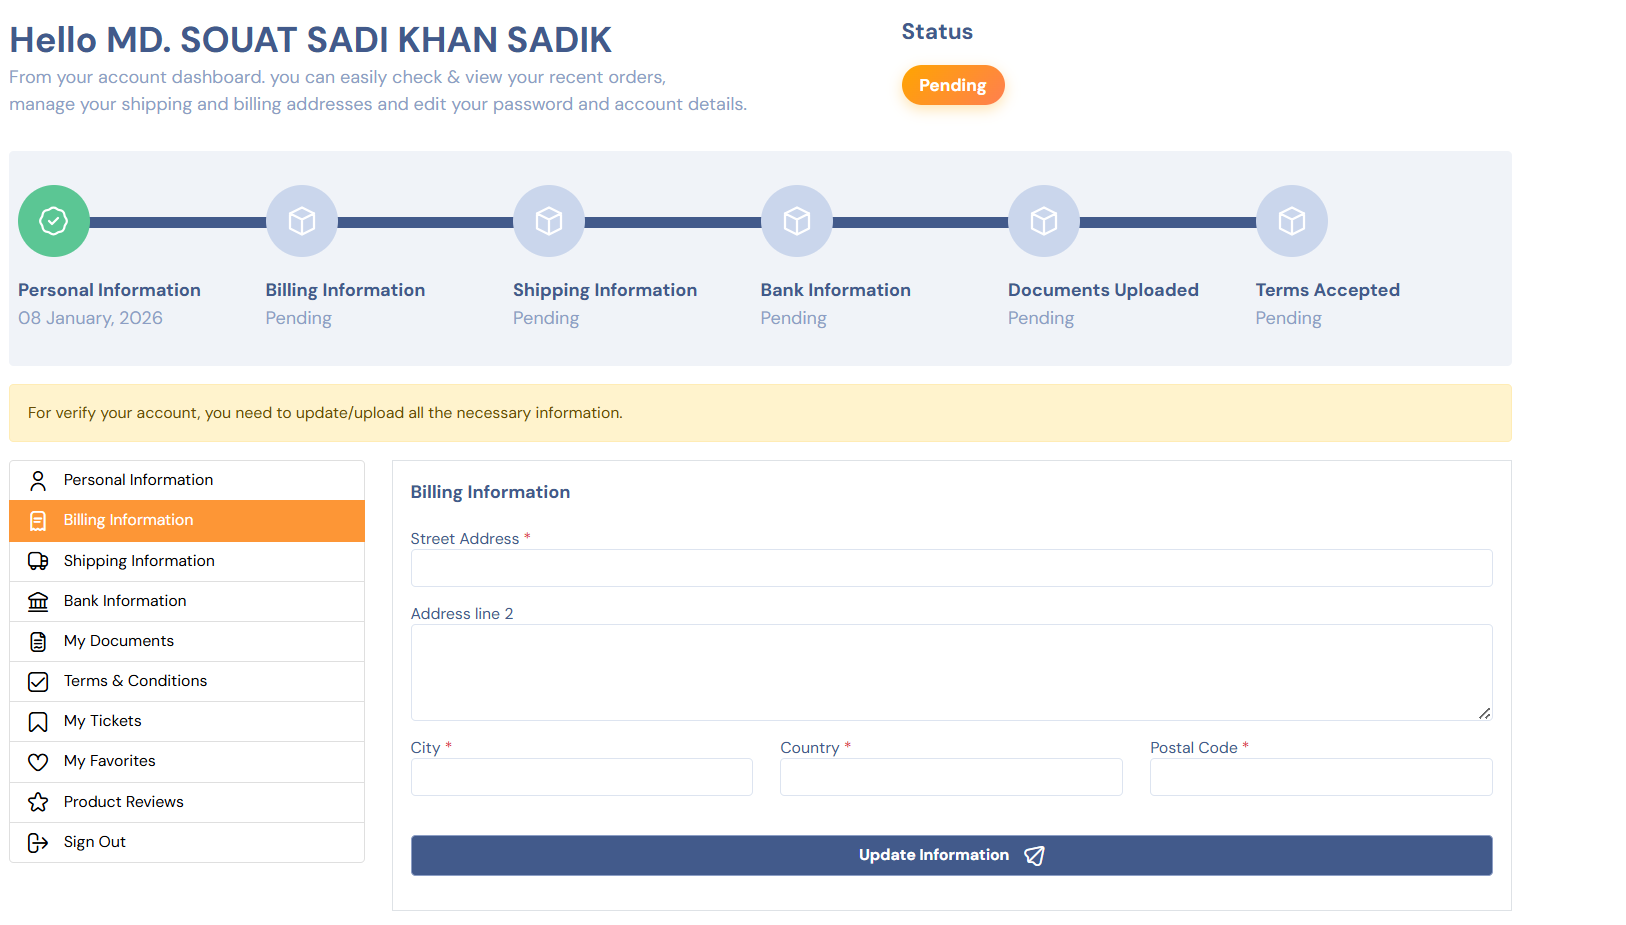
- Street Address: Required
- Address Line 2: Optional
- City: Required
- Country: Required
- Postal Code: Required
Once all required fields are filled, click the Update Information button. The system will validate your data.
If there are any errors, you will see a clear message explaining what needs to be fixed. Correct them and click Update Information again.
If everything is valid, you'll see a success message confirming that your billing information has been saved.
Step 7: Add Your Shipping Information
Your shipping information is used to deliver products and official documents to you. In most cases, this can be the same as your billing address—but please review it carefully.

- Street Address: Required
- Address Line 2: Optional
- City: Required
- Country: Required
- Postal Code: Required
After filling in the required fields, click the Update Information button. The system will automatically validate your details.
If any information is missing or incorrect, you’ll see a clear error message explaining what needs to be fixed.
Once everything is correct, a success message will confirm that your shipping information has been saved successfully.
Step 8: Provide Your Bank Information
Your bank information is required for financial verification and future transactions. Please make sure all mandatory fields are filled correctly.
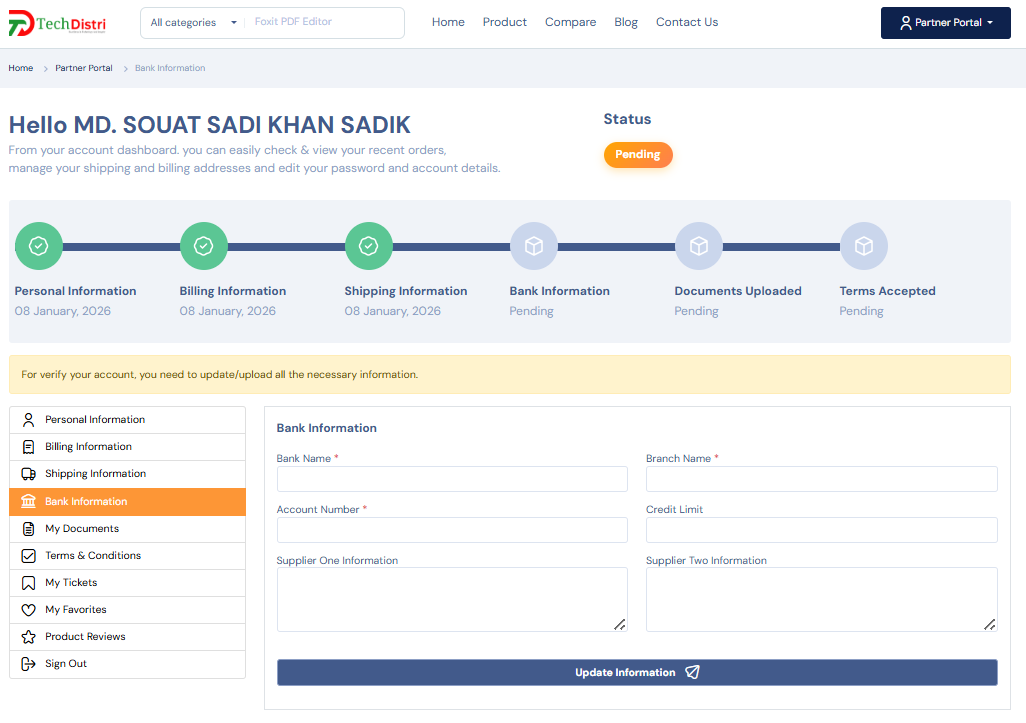
- Bank Name: Required
- Branch Name: Required
- Account Number: Required
- Credit Limit: Optional
- Supplier One Information: Optional
- Supplier Two Information: Optional
Once all required information is entered, click the Update Information button. The system will validate your data automatically.
If any required field is missing or incorrect, you will see a clear error message explaining what needs to be fixed.
If everything is correct, a success message will appear confirming that your bank information has been saved successfully.
Step 9: Upload Your Required Documents
To complete your partner application, you need to upload a few official documents. These documents help us verify your business and process your application smoothly.
Important: Maximum file size is 2MB per file. Supported file types: jpg, jpeg, png, pdf, webp, svg, word, csv, xlsx, xls. We recommend uploading files one by one instead of all at once.
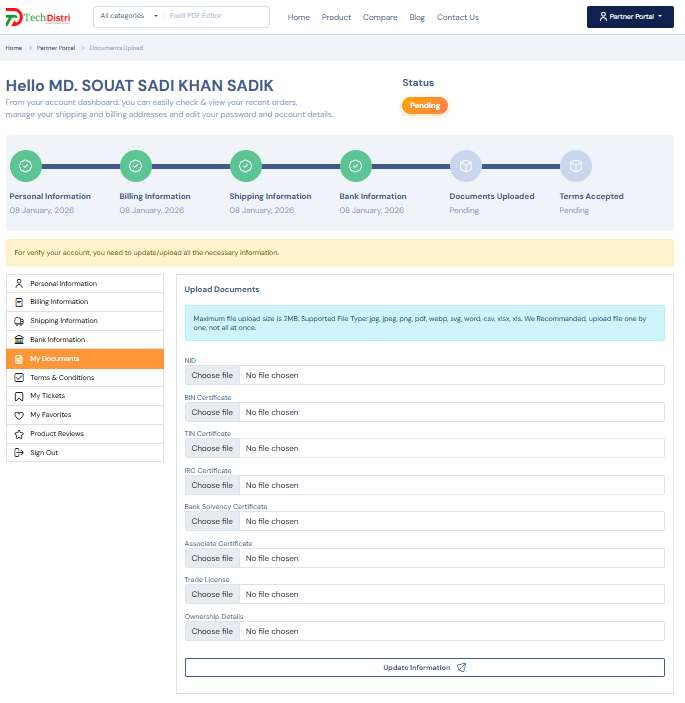
Required Documents
- NID: Required
- BIN Certificate: Required
- TIN Certificate: Required
- Trade License: Required
Optional / Supporting Documents
- IRC Certificate
- Bank Solvency Certificate
- Associate Certificate
- Ownership Details
When you click on the Update Information Button, it will take some times, because system will validate your data and if all ok then store in a Secure, Encrypted storage. So that your data will stay remain private.
If any file does not meet the size or format requirements, the system will show a clear error message. Once all required documents are uploaded successfully, this step will be marked as completed.
Final Step: Accept Terms & Submit Your Application
You're almost done! 🎉 Before submitting your partner application, please review and accept the TechDistri Terms & Conditions.
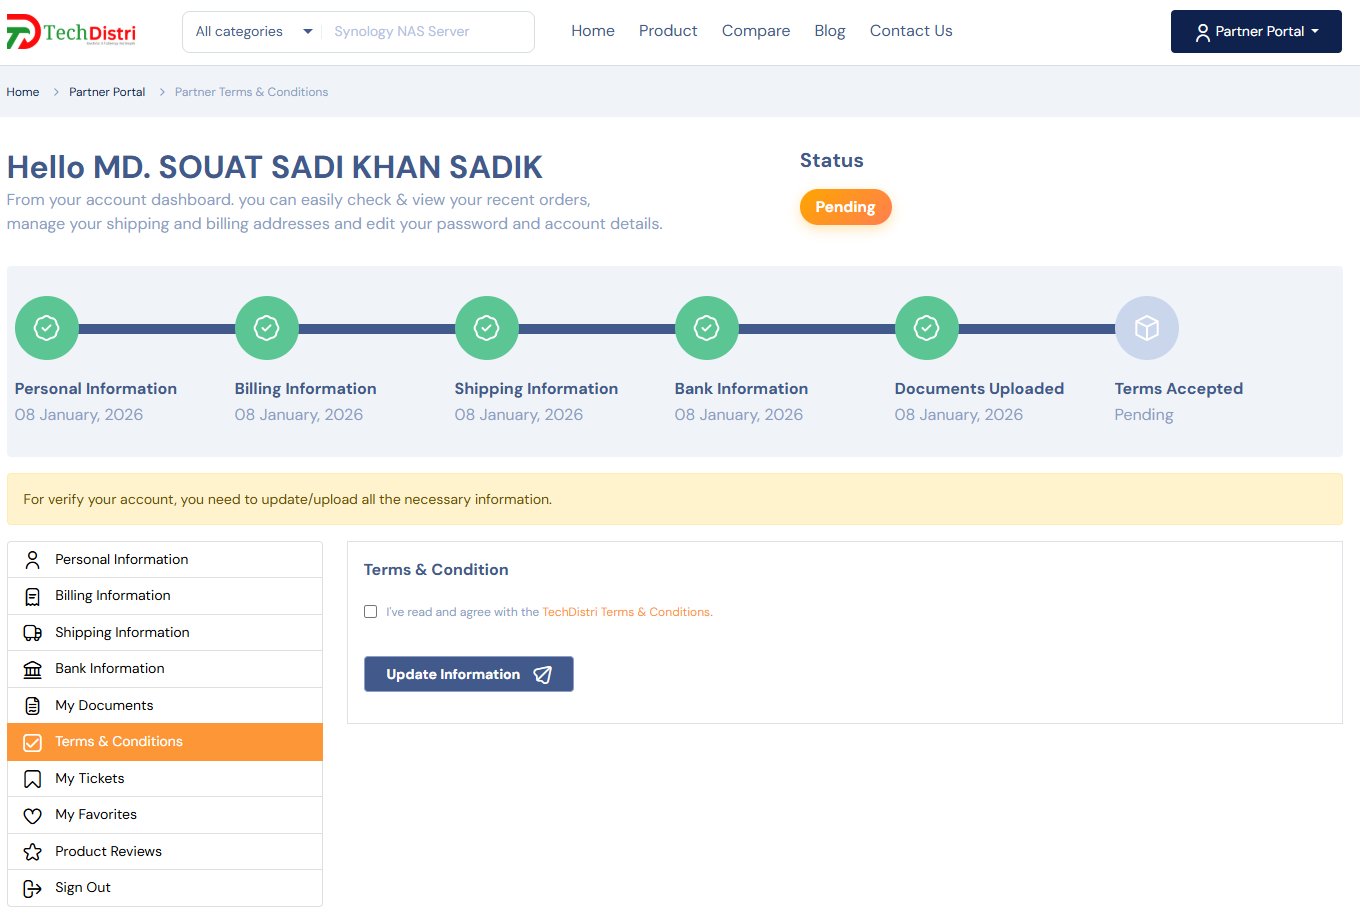
In this section, you’ll find a checkbox labeled:
“I’ve read and agree with the TechDistri Terms & Conditions”
Clicking on “TechDistri Terms & Conditions” will open the full document in a new browser tab, allowing you to read everything carefully before accepting.
Once you check the box, click the “Update Information” button to submit your application.
After this step is completed, your profile setup is finished and your account status will change to “Waiting For Approval”.
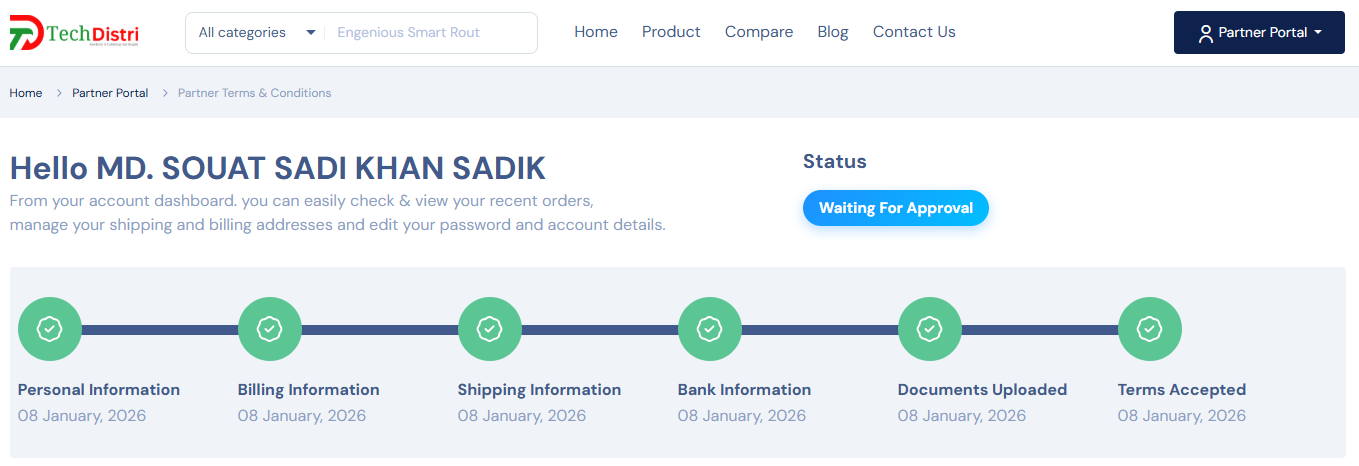
Our admin team will now review your submitted information and documents.
If everything looks good, your account will be approved and marked as a Verified Partner.
If any information is missing or needs correction, our team will contact you via phone or email and guide you on which section needs to be updated.